Everyone has a favorite room right? A place you just like to be for one reason or another. I’m sure qualifications for favorite room differ from person to person, but I want my favorite room to be beautiful and cozy. Laundry rooms and bathrooms, sorry guys, you may be beautifully decorated and have drool-worthy organization, but I don’t want to sit in you with my cup of morning coffee.
My favorite room is my bedroom, but that wasn’t always the case. Last June I took on a redecorating project in my bedroom that was one of my toughest projects to date. And it all started because I made a mistake.
Phase 1: Mistakes Were Made
Let me give you a little bit of background first: When it comes to home projects I’m a little bit lazy and I don’t like spending more money than necessary. If I can get away with doing less work and spending less money that is the path I will choose every time. Would my home look nicer and more put together if I wasn’t this way? Absolutely. Will I change my ways? Not likely.
So it came to be that I decided to pick up a gallon of dark green paint and paint the wall behind my bed. This, I thought, will be amazing. Not only did I need less than a gallon of paint to complete this project, I could paint the wall in an afternoon all by myself. A win all around!
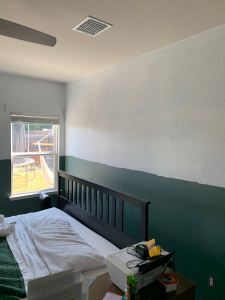
Except, of course, it looked like crap. I kind of liked it when I was finished. But I think I was trying my hardest to like it since I had already poured a moderate amount of time and effort into it. For reference, here is the offending wall:
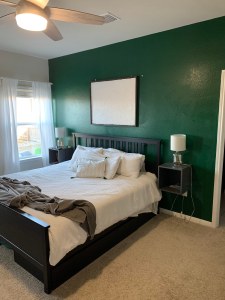
Every time I walked into my room I hated it a little bit more.
Oh, I forgot to mention, my husband hated it from the moment he laid eyes on it. To his credit he didn’t say he hated it out loud, it was more of a, “Oh. Ok. There is a thing you spent time and money on while I was at work.”
And yes, I neglected to tell him I was painting beforehand. The mistakes just keep piling on.
A few months later I decided the accent wall just made the room feel half-finished. Maybe a color blocked wall would make things better? I had a lot of leftover green paint and the kids were at school so I went for it.
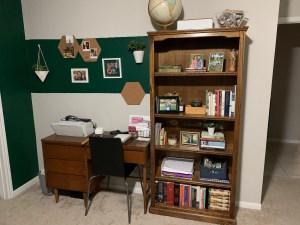
Surprise, surprise, I hated this even more. The lines were not crisp, and it felt thrown together because, well, it was thrown together.
Fortunately, Pinterest and Instagram constantly bombard me with images of homes that are more stylish and expensive than mine. So when I finally came around to acknowledge that yes, I made a mistake and I needed to own up to it, I knew where to turn for inspiration.
Phase 2: Design and Prep
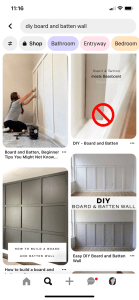
There are approximately 4,000,000 bloggers who have tutorials on “DIY Board and Batten Wall” (just Google it if you don’t believe me). So as soon as I decided I wanted board and batten it wasn’t hard to find out how to do it.
What I liked the most in all of the examples I saw was a dark color on the bottom half of the wall and a light color up top. I still liked the idea of incorporating green in my bedroom, but I wanted to lighten it up a bit.
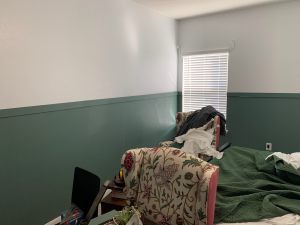
My grandparents gave me two chairs that I am obsessed with (you can see them in some of my photos further on in the post), so I took my color inspiration from them. I went with dark sage green for the bottom and bright white on top.
I roped my husband into helping me pick out, cut, and nail up the boards. He only agreed because, he finally admitted, he hated the green accent wall and would do anything to change it.
Once we measured the space, calculated the number of boards we would need, reconsidered the project because the cost of lumber is WOW a lot more than we thought, and went to Lowes 7 times, we were ready to start.
Phase 3: The Hard Parts
In order to cover up the dark green I had to paint several coats of white, which made me very grateful I didn’t paint my entire room. Then I painted the bottom half of the room sage green. My husband used his laser level to mark exactly how high I needed to paint on the wall, which worked a lot better than my previous method of eyeballing it.
At this point I started to get really excited. It was happening! Our room was becoming beautiful again! It wasn’t plain builder-grade gray paint, and it wasn’t the painful yet somehow dull dark green. This, I thought, will be amazing.
I don’t know about everyone else but painting feels fun for about half an hour. Then I’m over it. I want to be done. Why are there so many corners in my room? Why do I have to keep refilling my paint roller? My arms hurt and I want to take a break.
Finally, I got the base coats finished and it was time for the boards my husband had dutifully cut into the right sizes and shapes. We decided the vertical boards needed to be cut at an angle at the bottom. This cut gives it a cleaner, more streamlined look. However, while it looks amazing it is a huge pain in the rear to do.
Keep in mind, at every step of this process my husband asks me “should we do this thing that will take twice as long but look so much better?” and I say “no, let’s just finish it the easy way. I’m hungry.” And he decides to take the more difficult and rewarding route because that is the type of person he is.
I truly don’t deserve him.
We painted every board, then started nailing them to the wall (into studs of course!) starting with the horizontal boards.
After these boards were nailed we spread out the vertical boards to see how spaced out we wanted them to be. I knew they would look better closer together, but it would take less time to finish the project if we spread them out. So I sent pictures of each option to my friend Kayla and crossed my fingers that she would like the spaced out ones better.
But of course, she said closer was better.
So we made sure every vertical board was the right length and nailed them onto the walls. After that was finished I felt like we were on the home stretch, and for the most part we were.
Phase 4: Finishing Touches
When all the boards were nailed up we had to caulk all around them to make it seem like the boards were flush against the textured wall, an impossibility. Then we had to paint over the caulk and touch up any other areas in need.
Again I lamented, why are there so many corners? Except this time there were even more corners, all of my own creation.
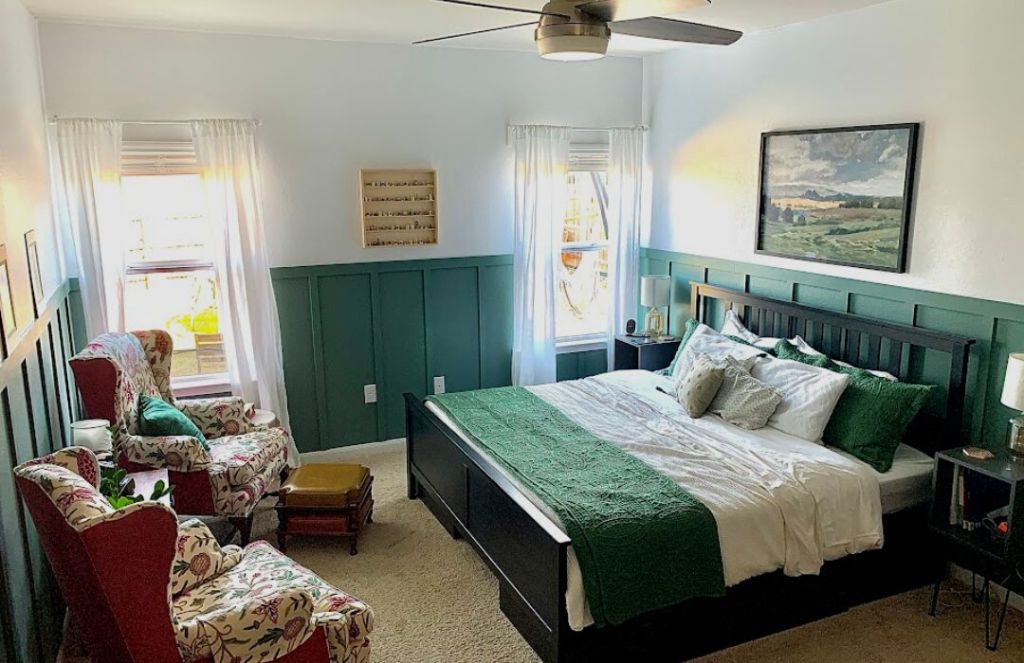
Finally, finally, it was finished. I pushed my furniture back where it belonged. Switched the art above my bed with one that was hanging in my living room. Rearranged a few furniture pieces. And at last sat in my favorite chair by the window.

This project took a solid week of constant work. My kids were at sleep-away camp so I devoted my entire life to it. I put on an audiobook (Dracula by Bram Stoker), then another one (Into Thin Air by Jon Krakauer) because it took me that long. I was so tired and DONE when the whole thing wrapped up. Plus it was WAY more expensive than I originally budgeted for. I started to wonder if redecorating my bedroom had been the worst decision I ever made. I could live with a less than stellar bedroom, I’m not that picky. So… was it worth it?
Absolutely.
Now my bedroom is my favorite place to be. It is beautiful and cozy. In the morning I can sit by the window with my coffee and watch the sun rise. I read my Bible, or take a book from the to-be-read stack on my bedside table.
I’m not an expert in interior design (see above mistakes), but I know the best rooms are the ones you feel most comfortable in. It doesn’t have to be Pinterest or Instagram-worthy to be lovable. It just has to make you feel good. And I certainly feel good in my favorite room.
